Welcome back to another Brawl Basics guide, our series that goes through the stats and the basics for every brawler! In particular, this guide will go through the basics for the mysterious mythic Tara! Let’s start with an overview of her stats.
Stats: Tara
Overview:
– Rarity – Mythic
– Movement Speed – 720
Attack:
– Range – 8
– Reload – 2 Seconds
– Number of Projectiles – 3
– At Level 1:
– Hitpoints – 3200
– Damage per Projectile – 380
– At Level 10:
– Hitpoints – 4480
– Damage per Projectile – 532
Super:
– Range – 6.33
– At Level 1:
– Damage – 800
– At Level 10:
– 1120
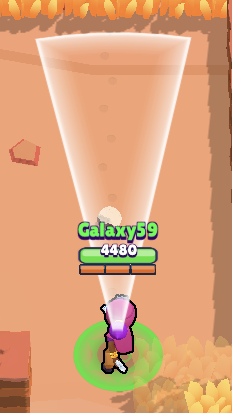
Attack: Triple Tarot
Tara’s attack throws 3 cards in a cone in front of her, with two along both edges and one in the middle. This attack has the unique characteristic of piercing through enemies, an effect which is usually reserved for supers such as Colt’s Bullet Train or Rico’s Trickshot. Because of this, this attack combines well with Tara’s super.
Pro Tip: As Tara’s attack is centered when it is quick-fired, resulting in only 1 card hitting a target. If you aim and offset the center a little, you can get 2 cards to hit, ultimately dealing more damage.
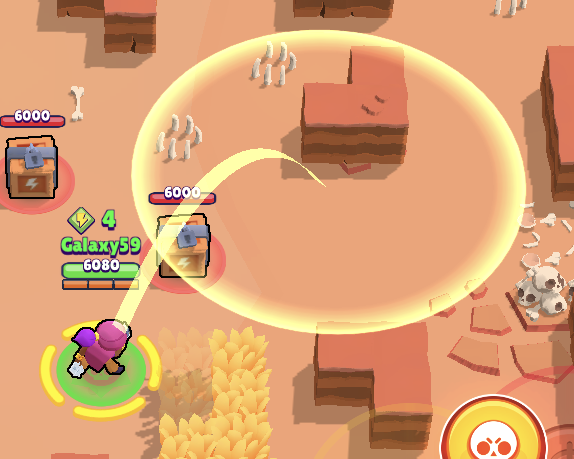
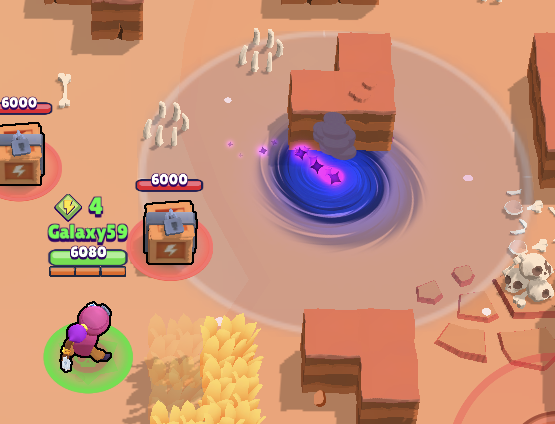
Super: Gravity
Tara’s super throws out a ball depicted with her unique eye design on it. When it hits the ground, all enemies and minions apart from turrets (Jessie, Penny and Pam’s super’s) are pulled to the center and knocked apart, dealing damage. It takes a relatively long time to charge up Tara’s super, so use it wisely!
An excellent technique is to run towards the enemy team. They may continue to charge you or they may scatter, but either way you can throw down Gravity, pull 2 or 3 of them together and unload attacks at close range. This method is effective as Triple Tarot pierces enemies, allowing it to hit multiple opponents at a time. If this is done with 2 enemies or more, it is usually enough to recharge the super again.
This super also can break walls in a 2×2 area at the center of the pull, so in certain maps, using it to do so is not a waste! If you can, also pull in one of the enemy so you can recharge a large chunk of it back as well. Her super can also be used to pull the enemy into a mine cart! This will eliminate all brawlers except for Frank and El Primo at full health. However, keep in mine that this will not recharge her super at all.
Pro Tip: When not bursting, Tara does well to ensure her ammo is above 1 due to her extremely slow reload speed. This allows her to use her super at any moment and still be able to benefit from it.
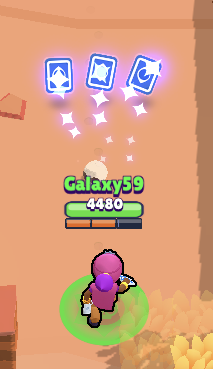
Star Power 1: Black Portal
Tara’s first Star Power summons a shadow form of Tara which has 2400 health and deals 400 damage. Although this may seem weak, it has an extremely fast movement speed, the highest base movement speed in the game. This makes it an immediate threat to all players, as when left unchecked it can deal a relatively large sum of damage to a brawler.
This star power is more aggressive and always gets at least 1 attack off if an enemy is hit due to the super’s effect of pulling in opponents. Usually this effect isn’t the main intention of using Gravity, so this star power is best considered as a highly aggressive meat shield.
Star Power 2: Healing Shade
Tara’s second Star Power creates a form of Tara with the exact same stats as the one created by Black Portal, however instead of attacking the enemy, it will instead heal Tara’s team for 400 health per attack. It does this at a range.
The big issue with this star power is that when the super is used as it should, it puts the healing shadow right in the middle of the enemy team and, let’s be honest, it doesn’t have the highest of healths. Because of the time it takes to charge up Tara’s super, it is usually not worth it to throw the healing shade into a corner to heal the team. This star power is best seen as a meat shield which instead gives your team a couple more hitpoints, potentially turning the tide of a team fight.
How to use Tara
Tara is one of the best team wipers in the game, with her ability to pull all 3 together and reduce their health bars down to almost nothing. She shines in Gem Grab and Brawl Ball, in which control is much more significant than damage or survivability.
In Gem Grab, Tara can be played as an aggro brawler and typically not a gem carrier due to her relatively low health and survivability. She does better at keeping the enemy team back and in control, staying forward on the front line and staying in combat. When she gets her super, it can be either used to wipe out the enemy team or target a specific brawler who may have a large quantity of gems on their person…
In Showdown, Tara is again best not used due to her low damage per second and her lack of survivability. However, she can be good at farming boxes with her piercing attacks. Tara should poke enemies and keep them at a distance. Her super is best used to keep enemies back if she is being chased or to pull two enemies together, encouraging them to engage and fight, allowing you to finish off the victor.
In Heist, Tara should again not be used due to her low damage per second. Her long reload time and low damage output makes her overall potential damage extremely low. If she is used in Heist, she should control the center, keeping enemies away from your safe and allowing your teammates to attack the enemy safe.
In Bounty, Tara is best not used to her low damage per second ratio. She is best used in maps which feature large groups of bushes, but not large enough to encourage bush campers such as Bull or El Primo to be common. She should poke the enemy team until she gets her super, when she should aim to target the enemy with the most stars.
In Brawl Ball, Tara should be played similarly to how she is used in Gem Grab, being aggressive and charging up her super as soon as possible. When she gets her super, it should be used to wipe out 2 or 3 of the enemy team, leaving the way clear for your team to score. Just be cautious – due to her slow reload speed, if she has the ball she could be helpless to the enemy!
In Seige, Tara does decently well as a controller. She can control the center and, again, be aggressive. However, unlike in Gem Grab and Brawl Ball, she should also hold back occasionally to pick up bolts. Her super is best used like in Brawl Ball, to wipe out the enemy team, leaving the way clear to pick up bolts or attack the IKE! Keep in mind however that her low damage per second causes her to deal minimal damage to the safe, doing better at eliminating the opponents around it.
Tara Tips
- Be aggressive, but don’t forget about the objective!
Being aggressive with Tara is the name of the game, however being too aggressive will result in your death. This will disadvantage your team, as they will have to hold back for about 10 seconds as you re-spawn. Make sure you hold the enemy back, but don’t die yourself! Keep yourself alive as a constant potential threat.
2. When using your super, don’t be afraid of death!
Now, I know this sounds stupid, but hear me out!
Let’s assume Tara has used her super and has pulled in 2 of the enemy in Brawl Ball. However, instead of following up, she turns around and runs away, afraid of dying. This is not a good way to use her super! Not only have you wasted it, you also have done pretty much nothing to the enemy! They can heal up the lost health in no time, as one thousand is not enough to kill anything in the game!
Now, let’s assume a Tara does the same thing, pulling in 2 of the enemy team, but instead charges in and unloads all 3 of her attacks. She dies to the last teammate, but she took 2 of the enemy team down with her, recharging her entire super at the same time. Although the Tara died, she got a huge benefit out of it, removing 2 of the enemy off the field for the price of 1, as well as charging it back up. Now that’s value!
Conclusion
Overall, Tara is a brawler who does well as an aggressive controller. She can easily wipe out the enemy team with the correct use of her super and charge it back while doing so. All in all, I would say that she is a well rounded brawler who is strong in specific control-oriented game modes.
That’s all for this Brawler Basics guide! I hope you take something from this guide, as Tara is one of the harder brawlers to use well. See more guides on our website by searching for them under the “Guides” category. Check out other guides in the Brawler Basics series by going to the Categories drop-down in the sidebar. Thanks for reading, and as always, Brawl on!

